
Install WordPress On Localhost With XAMPP Server – Beginner’s Guide
If you are a newbie to WordPress, you may want to install WordPress on your PC. However, you can easily install WordPress on your PC. But You also need to install the XAMPP server with WordPress. XAMPP Server is very important software to install WordPress. Today I will tell you How to Install WordPress On Localhost With XAMPP Server.
However, There are various advantages of installing WordPress on localhost using XAMPP. Additionally, You can run a fully functional site on your PC without any internet connection. Once you installed WordPress on your system, it will be loaded to your localhost instantly. Also, you can Install WordPress On Localhost With XAMPP Server to test various themes and plugins on your WordPress site. Besides, some people also Install WordPress On Localhost With XAMPP Server to learn WordPress so that they can move to a live site later on.
This post will provide you a step by step beginner’s guide to Install WordPress On Localhost With XAMPP Server.
So let’s start.
Install WordPress On Localhost With XAMPP Server
Although, it is very easy to Install WordPress On Localhost With XAMPP Server but it is a bit lengthy process. Just grab a cup of tea.
Are you ready?
Ok, We firstly setup XAMPP Server on PC and then WordPress.
-
Install XAMPP Server on PC
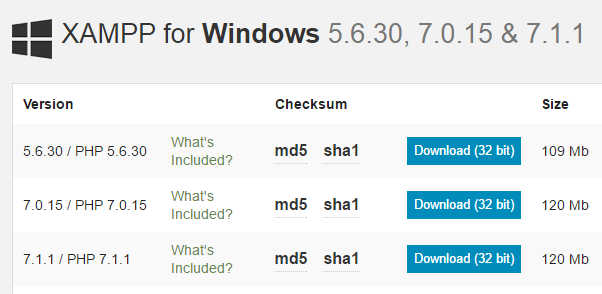
- Firstly, visit the official site of XAMPP and download the XAMPP according to your system configuration.
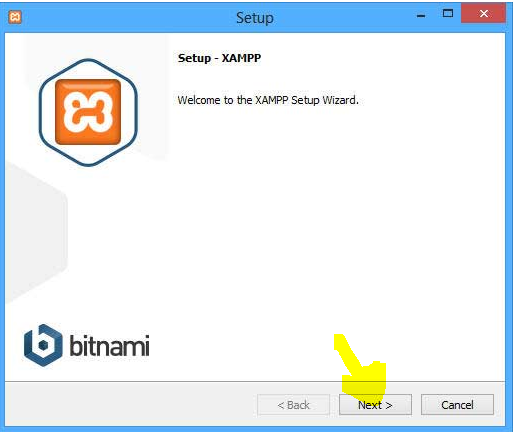
- Now, you have to install XAMPP, when you will click on the downloaded file, it will automatically open the XAMPP Setup Wizard. Then click on “Next” button.
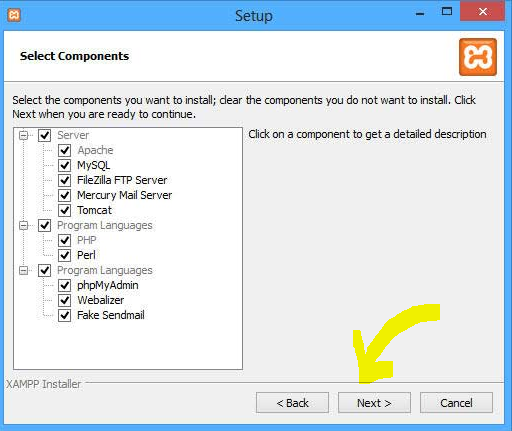
- On next window, you will see various options where you have to select the components you want to install. Check the important components like Apache, PHP, MySQL and phpMyAdmin, you can uncheck the other options and click on the Next
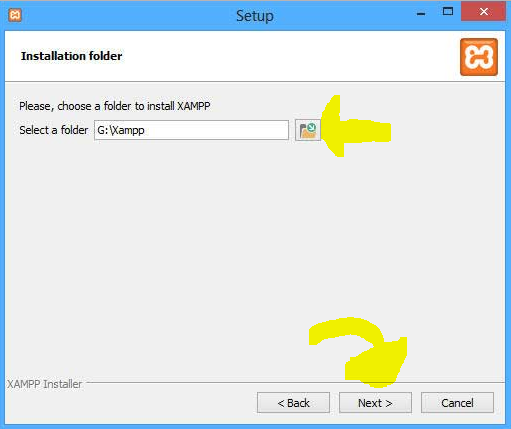
- In next step, you have to select the location where you want to install the XAMPP. You can click the file icon to select the location. Once you selected the particular folder, click Next.
- Then you will be asked to install Bitnami, but we don’t need this option because we will Install WordPress On Localhost With XAMPP Server manually. So, uncheck the box and click on the Next button.
- Now XAMPP is ready to install. Click on the Next button to start the installation process.
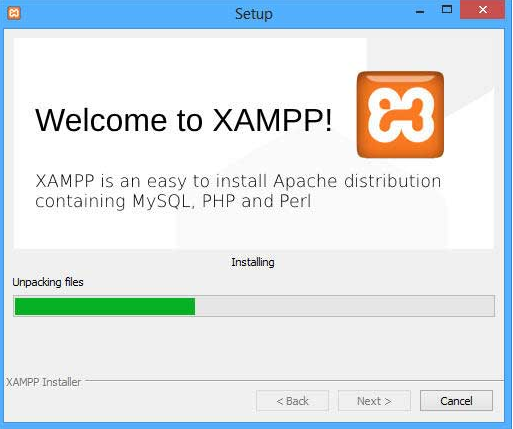
- On next, you will see “Welcome to XAMPP”. Your XAMPP installation process will get started. It will take few minutes to complete the installation.
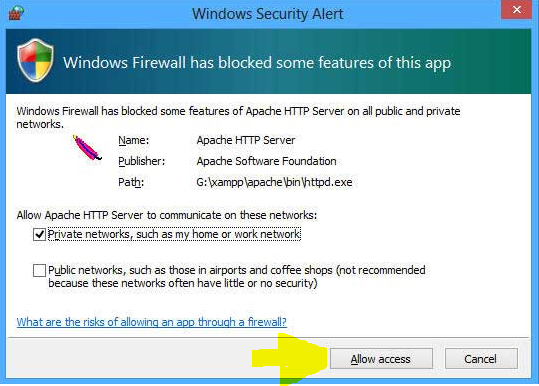
- Meanwhile, you may get a security notice. You have to check the option “Private networks..” and uncheck “Public network..”. Click on “Allow Access”.
-
When installation will get completed, click on the Finish button to start XAMPP Control Panel.
- On XAMPP Control Panel, you have to change the status of Apache and MySQL, click on the start button to start Apache and MySQL.
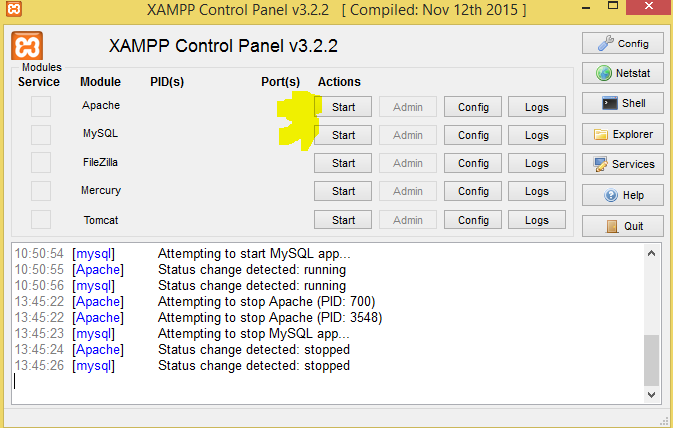
If both are started successfully, you will see the green light behind both the components. Congrats, you have successfully installed XAMPP on your PC. Now you can test Xampp on your local server. Just enter the localhost in any browser. You will see the following dashboard on your browser screen.
If you will face any error, Read this article:

In the second step, we will create a database which you will need while installing WordPress on your PC.
-
Create Database
- Enter the URL http://localhost/phpmyadmin/ in your browser. You will see the following window. Click on the link new which is given at the right side of the phpMyAdmin Dashboard.
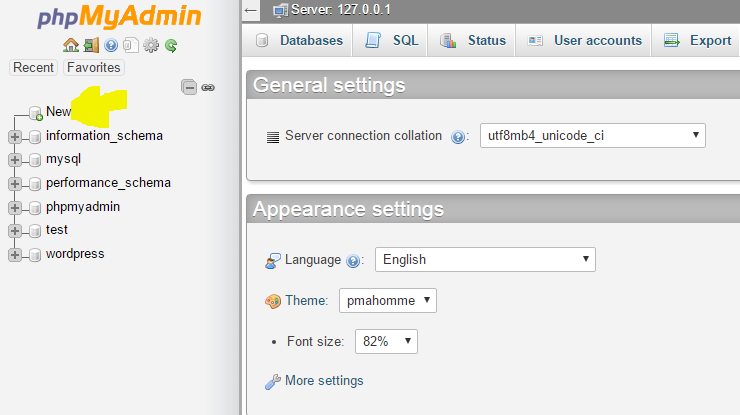
- In the resulting screen, you have to enter a name for a new database such as I entered wordpress. Then click “create” to create the database.

Congrats, you have now created a new database to install WordPress on localhost. Let’s configure WordPress on localhost.
-
Install WordPress on PC
- Firstly, visit the site WordPress and Click on the “Download WordPress” button to download the file.

- Once you downloaded the file, extract the files and copy the WordPress folder. Then paste the folder into location “C:\xampp\htdocs” where you have installed the XAMPP.
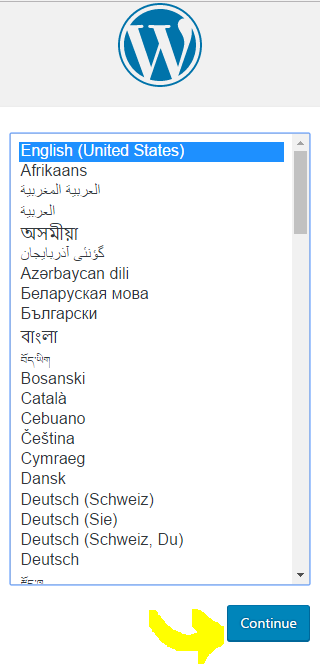
- Next, enter the URL “http://localhost/wordpress/“ in your browser. In resulting screen, you have to choose the language and click on the Continue button.
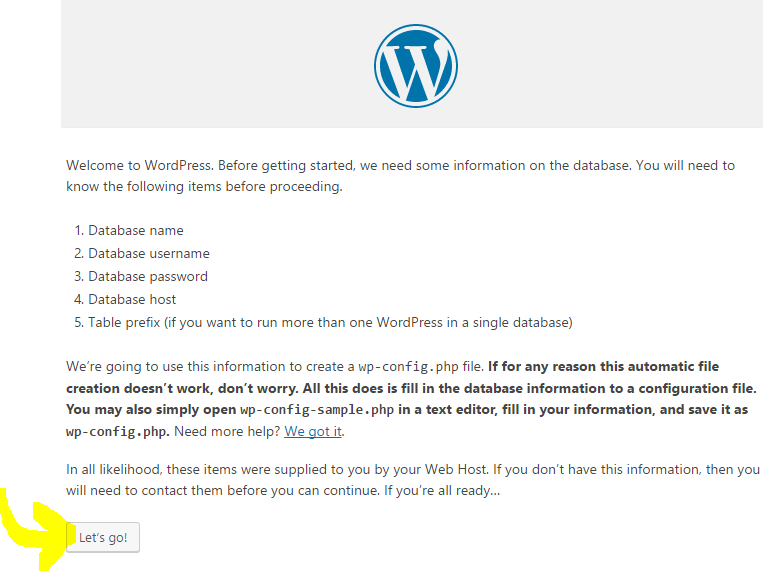
- In next step, they will tell you the database information they required to configure WordPress on localhost. Click on the Lets Go button to move further.
- Next, enter the details of your database connection. Click on the Submit
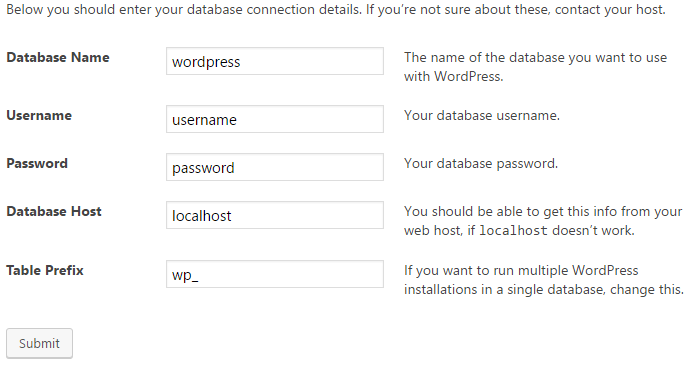
Provide the following information:
Database Name: Write the name of the database you created a while back.
User Name: root
Password: Leave it blank
Database Host: localhost
Table Prefix: wp_
- In next step, click “Run the install” button.

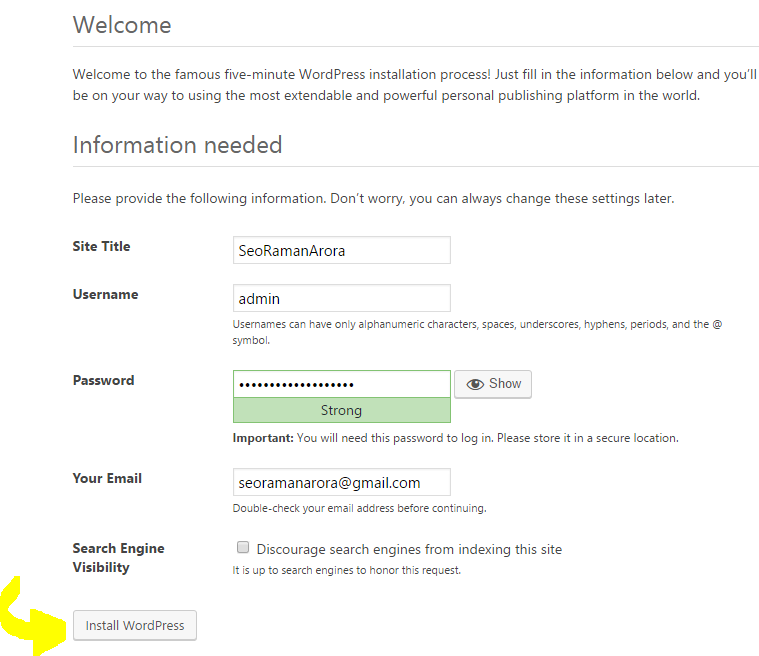
- On the next window, you need to enter some details like:
Site Title: Enter a particular title for your WordPress site.
Username: Select a username which you will use to log into your WordPress dashboard.
Password: Choose a strong password.
You Email: Enter the email address that you want to use for your WordPress site.
Once you provided the details, click on the “Install WordPress” button.
- Now you will be landed to WordPress Login page. Enter your username and password. Then click on the “Log In” button.
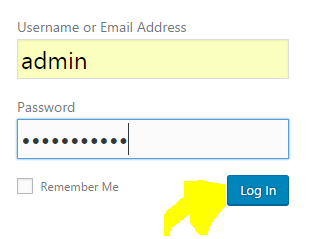
Congratulations, you have successfully Install WordPress On Localhost With XAMPP Server!
You will see the WordPress Dashboards on next screen. Here, you can customize your WordPress site by trying different themes and plugins.
Wrap-Up
I hope you get the valuable information from this article. I am sure; you can successfully Install WordPress On Localhost With XAMPP Server If you follow this guide.
Related Article:
- How To Create XML Sitemap In WordPress For Beginners
- How To Find And Fix Broken Links On WordPress Blog
- How To Move Localhost WordPress Site to Web hosting Server
- Some Basic Tips for WordPress Beginners!
Besides, If any problem arises when you Install WordPress On Localhost With XAMPP Server, let me know via comments. I would love to help you out. Further, if you have any query regarding this article, leave a comment below.
If you like this article, Subscribe to my blog “SEORamanArora” to get daily updates. Also, share this post with your friends. Moreover, you can keep in touch me on Facebook, Tumblr, twitter, Instagram Linkedin, Google+ and my Youtube Channel.


No Comments